
If you've ever inherited a "one-codebase for many clients" app and felt like you were defusing a bomb every release, this one's for you. White-labeling shouldn't be a constant mess of copy/paste, fragile if (client == "X") checks, and last-minute image swaps. Done right, you get a single, maintainable codebase that can spin up client builds fast — and survive bug fixes with minimal pain.
Not a paid subscriber? Click here to read this story for free.
Below, I'll walk you through the architecture, patterns, concrete code snippets, CI tips, and the gotchas I keep running into. Think of this as the small operations manual I hand every team during onboarding.
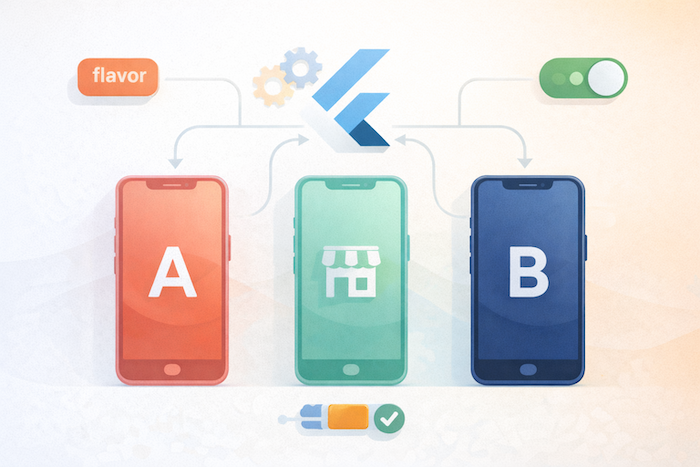
The one-line plan
- Separate identity (app id, icons), brand config (colors, fonts, assets), features (toggles) and runtime data (endpoints).
- Use flavors for platform identity (Android productFlavors + iOS schemes).
- Keep branding data in a small JSON or Dart config per client and inject it at build or app bootstrap.
- Use feature toggles (remote or build-time) for client differences in behavior.
- Automate builds in CI (one job per client) that inject assets/configs, sign, and release.
Mental model: identity vs config vs behavior
Before we dig code, set clear responsibilities:
- Identity = package name / bundle id, icons, display name (use flavors).
- Brand config = colors, fonts, logos, localized strings (switchable per client).
- Behavior/features = what is on/off (use feature toggles).
- Runtime endpoints / secrets = API base URL, keys (inject via CI secrets, not committed).
When these concerns are separated, swapping a client theme is just a CI job and a config file — not a code change.
Project layout (suggested)
Keep client assets/configs out of the common lib and grouped per client:
/assets/clients/
  client_a/
    logo.png
    font/
    theme.json
  client_b/
    logo.png
    theme.json
lib/
  main_common.dart       // shared bootstrap
  main_client_a.dart     // small file: inject client config then run common
  src/
    app.dart
    config/
      brand_config.dart
      feature_flags.dart
    ui/
      theme_builder.dart
    features/
      payments/
      onboarding/
android/
  app/src/clientA/
  app/src/clientB/
ios/
  Runner/Configs/ClientA-Info.plist
  Runner/Configs/ClientB-Info.plist
main_client_a.dart and main_client_b.dart are tiny: they tell the app which client to load and which asset path to use.
Brand config pattern (JSON + small Dart wrapper)
Store theme values per client in JSON so designers can change them without touching Dart.
Example assets/clients/client_a/theme.json
{
  "primaryColor": "#0A84FF",
  "accentColor": "#FFD60A",
  "fontFamily": "Inter",
  "logo": "assets/clients/client_a/logo.png"
}
Dart wrapper brand_config.dart
import 'dart:convert';
import 'package:flutter/services.dart';
import 'package:flutter/material.dart';

class BrandConfig {
  final Color primaryColor;
  final Color accentColor;
  final String fontFamily;
  final String logoAsset;
  BrandConfig({
    required this.primaryColor,
    required this.accentColor,
    required this.fontFamily,
    required this.logoAsset,
  });
  static Future<BrandConfig> fromAsset(String path) async {
    final raw = await rootBundle.loadString(path);
    final map = json.decode(raw);
    Color color(String hex) => Color(int.parse(hex.substring(1), radix: 16) + 0xFF000000);
    return BrandConfig(
      primaryColor: color(map['primaryColor']),
      accentColor: color(map['accentColor']),
      fontFamily: map['fontFamily'],
      logoAsset: map['logo'],
    );
  }
  ThemeData toTheme() {
    return ThemeData(
      primaryColor: primaryColor,
      colorScheme: ColorScheme.fromSeed(seedColor: primaryColor, primary: primaryColor, secondary: accentColor),
      fontFamily: fontFamily,
      // further theming as needed...
    );
  }
}
Bootstrap (in main_client_a.dart):
import 'package:flutter/material.dart';
import 'src/app.dart';
import 'src/config/brand_config.dart';

void main() async {
  WidgetsFlutterBinding.ensureInitialized();
  final brand = await BrandConfig.fromAsset('assets/clients/client_a/theme.json');
  runApp(MyApp(brandConfig: brand));
}
This keeps the runtime code the same — only the JSON changes.
Theme application & big visuals
Create a ThemeBuilder that consumes BrandConfig and exposes the Theme to the app:
class MyApp extends StatelessWidget {
  final BrandConfig brandConfig;
  const MyApp({required this.brandConfig});

  @override
  Widget build(BuildContext context) {
    return MaterialApp(
      title: 'Client App',
      theme: brandConfig.toTheme(),
      home: HomeScreen(brandConfig: brandConfig),
    );
  }
}
For large hero images / logos: keep them as client assets (vector/SVG preferable). Load them with SvgPicture.asset(brandConfig.logoAsset) to keep crisp visuals across screens.
Flavors = identity (package name, icons, provisioning)
Use flavors to create separate Android and iOS identities:
- Android:
app/build.gradle→productFlavors { clientA { applicationId "com.example.clientA" } } - iOS: Xcode → create Schemes & Configurations; use different
GoogleService-Info.plist/ entitlements per scheme.
Why? Because clients typically need unique bundle IDs, different push certificates, and independent store listings.
Feature toggles (build-time vs runtime)
- Build-time toggles — baked into binary via
--dart-defineor by compiling separate feature branches. Use these for structural differences (e.g., enabling an entire payments module). - Runtime toggles (remote) — Firebase Remote Config / LaunchDarkly / custom config endpoint. Use when you want to turn features on/off without a new build.
Simple --dart-define read
const kFeatureX = bool.fromEnvironment('FEATURE_X', defaultValue: false);In CI:
flutter build apk --flavor clientA -t lib/main_client_a.dart --dart-define=FEATURE_X=trueRuntime (pseudo):
- App reads a small
features.jsonfrom your CDN at startup, merges it with per-client defaults, and the UI/logic consultsFeatureFlags.isEnabled('checkout_v2').
Prefer a hybrid: compile-time defaults but allow remote overrides.
Assets pipeline & collisions
- Keep client assets in
assets/clients/<client>/...and reference them by path. - Use same file names inside each client folder (e.g.,
logo.svg) to avoid changing code. - If you must replace Android launcher icons, put them in
android/app/src/clientA/res/mipmap-*(flavors can include separate res folders).
Automate packaging in CI: copy the right client assets into the canonical asset path before flutter pub get & build.
CI/CD: one job per client (example)
Automate builds for each client. A GitHub Actions snippet (conceptual — adapt to your signing setup):
name: Build and Release Clients
on:
  push:
    branches: [ main ]
jobs:
  build-clientA:
    runs-on: ubuntu-latest
    steps:
      - uses: actions/checkout@v4
      - name: Setup Flutter
        uses: subosito/flutter-action@v2
        with:
          flutter-version: 'stable'
      - name: Copy client assets
        run: cp -R assets/clients/client_a/* assets/current/
      - name: Get deps
        run: flutter pub get
      - name: Build APK
        env:
          API_BASE: ${{ secrets.CLIENT_A_API_BASE }}
        run: flutter build apk --flavor clientA -t lib/main_client_a.dart --dart-define=API_BASE=$API_BASE
      - name: Upload artifact
        uses: actions/upload-artifact@v3
        with:
          name: clientA-apk
          path: build/app/outputs/flutter-apk/app-clientA-release.apk
Key points:
- Copy client assets into the canonical asset location in the repo (or have the app load directly from
assets/clients/<client>and pass client id). - Inject secrets (API keys, endpoints) from CI secrets. Never commit them.
Testing & QA strategy
- Unit tests for shared logic.
- Golden tests per theme (render a core screen with each brand config to catch text overflow, color contrast issues).
- Integration/e2e tests for critical flows. Run these against each flavor or at least a smoke test: startup, login, payment flow.
- Manual visual QA: designers should review screenshots from the build (take screenshots programmatically during CI).
- Staged internal releases per client (internal track/TestFlight) and a checklist that QA verifies for brand assets, icons, colors, and localized copy.
Localization & client content
Clients often want different copy or legal text. Two options:
- Same locale keys, different strings: Keep
l10n/strings_client_a.arband load the right file based on client id. - CMS-driven content: Pull client-specific content from a CMS so copy changes don't require a release.
When to do server-side white-label vs app-side
If differences are purely content (colors, copy, logos), client-side config is fine. If business logic differs drastically between clients (different payment providers, unique flows), prefer a server-side feature flag + contracts approach to keep app logic simpler.
Common pitfalls & how to avoid them
- Hardcoding brand values in multiple places: fix by central BrandConfig pattern.
- Changing bundle id but reusing same API keys: maintain client-scoped backend keys.
- Asset name collisions: use per-client folders or canonical path mapping.
- Plugins with static resources: some plugins embed resources that assume a single app id — test plugin behavior per flavor.
- Overloaded main files: keep
main_client.darttiny; avoid branching logic there.
Final notes — why this matters
White-label apps are a multiplier: done right, you can spin up new clients in hours (not weeks) and keep a unified roadmap. Done wrong, you'll be stuck with fragile hacks and terrified QA. The core idea is simple: codify brand as data, keep identity in flavors, and let CI do the heavy lifting.